
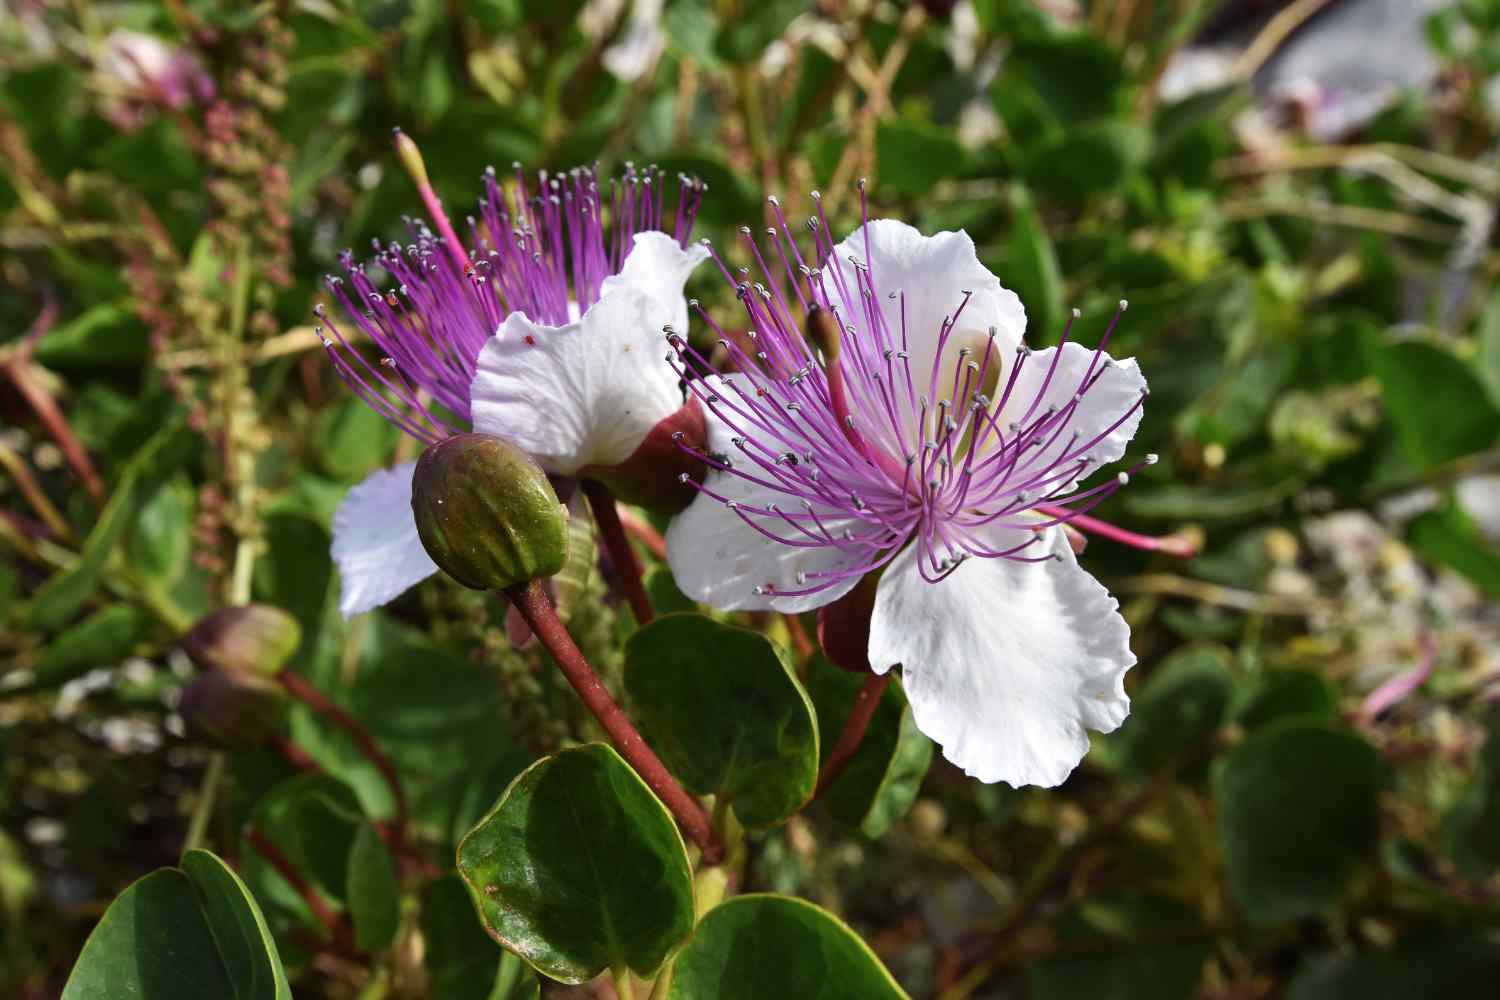
The caper (Capparis spinosa) is a perennial shrub, typical of the Mediterranean scrub, which for centuries has grown spontaneously along the coasts, on dry stone walls and in the cracks of the limestone rocks. It is a heliophilous and xerophilous plant: it loves full sun, dry heat and has very limited water needs, so much so that it develops well even in difficult contexts, such as between the stones of old walls or rocky outcrops.
From a botanical point of view it is a very branched shrub, evergreen and initially erect, which with growth tends to become trailing or semi-climbing. The central stem is woody, while the secondary branches, green or reddish, are herbaceous and equipped with curved thorns at the base of the leaves, which the plant uses as grips to anchor itself. The leaves are oval, fleshy, shiny and intense green, while the very showy flowers have four white or purple petals embellished with long pink or purple stamens.
The still closed flower buds are the part that we all know in the kitchen: collected and preserved in salt or vinegar, they are an indispensable ingredient of the Mediterranean tradition, appreciated for its intense and unmistakable flavour. In Italy the most renowned cultivations are found on the islands of Pantelleria and Salina, where the volcanic soil and the particularly favorable climate allow us to obtain capers of high quality, often grown without the need for treatments or fertilization.
Why propagate caper by cuttings
The caper can be reproduced both by seed and by cutting, but sowing is a rather complicated method: germination is slow and only a small percentage of the seeds manage to develop, because the plant struggles to adapt to conditions different from those in which it grows spontaneously in nature. For this reason, cuttings are generally the simplest and most reliable method for obtaining new seedlings starting from an already adult specimen, vigorous and well adapted to its environment.
How to make caper cuttings
First, cuttings are cut from a young and vigorous caper plant, approximately 10-15 cm long, preferably taking them from healthy, well-developed branches. Once cut, remove all the leaves from the cutting, paying close attention to the curved thorns typical of this plant, which can easily prick during handling.
At this point the base of the cutting must be immersed in rooting hormone, or, in the absence of this product, a pulverized aspirin tablet can be used: acetylsalicylic acid in fact performs a similar function, stimulating the formation of roots. A vase is then prepared filled with a mix of earth and soil, in which small holes are made, for example with the help of a pen, to be able to insert the cuttings without damaging them.
The cuttings must then be inserted into the prepared holes, compacting the soil well around the base; Finally, a little healing putty is applied to the cut part, useful for protecting the cutting from fungi and diseases. From this moment it is important to water with a spray bottle, in order to keep the soil constantly moist without incurring water stagnation. To increase the chances of success you can also cover the pot with a plastic bottle cut in half, so as to create a small greenhouse effect which favors the emission of the roots while maintaining humidity.
The first roots should appear within 3-4 weeks: at that point the caper plants will be ready to grow strong and healthy.
Useful information on caper cultivation
In addition to the propagation technique by cutting, it is worth knowing some characteristics of the plant, useful for making it grow at its best. The caper prefers very sunny and warm positions, essential for vigorous growth and good flowering, while it fears frost and excessively harsh climates: in the regions of Northern Italy it is more easily found cultivated within the walls of castles or ancient monuments, where drainage is optimal and the roots can insinuate themselves into cavities that retain a minimum of humidity.
Which soil to use
As for the soil, the caper grows best in poor, sandy and well-drained substrates, without the need for particularly nutrient-rich soil. However, water stagnation should always be avoided, because the aerial part of the plant is subject to rot, especially in spring and autumn, the rainiest seasons. Those who choose to grow capers in pots should opt for a terracotta container with a minimum height of about half a meter, filled with universal soil, field soil and sand in equal parts, as well as draining material.
What to do in winter
In winter, when the plant loses its leaves, the twigs can be shortened to a few centimeters from the base of the stem; plants grown in pots can also be protected from rain and frost by keeping them in an unheated area. The flowering is very abundant and lasts from May to October: the buds, which represent the true “capers” of the trade, must be collected when they are still closed, at the beginning of flowering, while the actual fruit, which forms after flowering, is called “cucunci” and is preserved with its long peduncle. A plant obtained from cuttings or seeds generally begins to produce the first buds useful for harvesting starting from the second year of life.
Among the best-known cultivars in Italy, the “Nocellara” stands out, with large, fleshy fruits suitable for preservation in brine, and the “Salina”, typical of the Aeolian Islands, appreciated for its small capers but with a particularly intense flavour; Pantelleria is also famous for the quality of its capers, often considered among the best in terms of taste and consistency. With the right attention – sun, well-drained soil and little water – the caper proves to be a rustic and generous plant, capable of producing spectacular flowers and buds ready for the table for many years.
FAQ
When is the best time to take caper cuttings?
The most suitable period is late spring or summer, when the mother plant is in full vegetation and the semi-woody twigs have the right consistency to root well.
Do caper cuttings take root easily?
It is not a very simple plant to propagate by cutting: the success rate can be variable, which is why it is important to prepare several cuttings at the same time, so as to have a greater chance that at least some will root.
Can I use woody cuttings instead of semi-woody ones?
It is preferable to use semi-woody cuttings, i.e. taken from twigs of the year that are not yet completely hardened: cuttings that are too woody root with greater difficulty, while those that are too soft risk rotting.
When are the new seedlings transplanted into the ground or into a permanent pot?
Once the roots have developed well, generally a few months after rooting, the seedling can be transplanted into a larger pot or into the ground, preferably in spring, when the risk of frost has now passed.
Why might the cutting not root?
The most common causes are excess humidity in the soil, which leads to rot, or a position that is too dim: the caper needs heat and light even during the rooting phase.
Is it necessary to fertilize the new plants?
In the initial phase it is not necessary: the caper adapts well to poor soil and excessive fertilization can be counterproductive for a plant accustomed to less fertile substrates.
Other useful tips
In addition to the main steps, there are some small measures that can make the difference in the success of the cutting. It is important to place the pot in a bright place but not exposed to direct rays during the hottest hours in the first few days, to prevent the cutting from dehydrating before it has developed roots capable of absorbing water.
The choice of tools also matters: the scissors or knife used for cutting should be clean and well sharpened, so as to obtain a clean cut that promotes healing and reduces the risk of fungal infections. It is also advisable to avoid moving or touching the cuttings in the first few weeks, because any movements can damage the newly formed roots, which are still very fragile.
If you use the plastic bottle to create the greenhouse effect, it is a good idea to lift it from time to time to ventilate and prevent the formation of mold due to excessive stagnant humidity. Finally, having patience is essential: the caper is not a very quick plant, and even after the first roots appear, growth can be rather slow in the first months, before definitively consolidating.
